If you’ve been around my blog for a while, you might have noticed that I tend to use chicken thighs, rather than chicken breasts, for my chicken recipes. Since all my recipes are supposed to be healthy, you might wonder why this is – after all, chicken breasts are a lot healthier for you than chicken thighs, right? Well, not necessarily.
Although it is true that chicken thighs are fattier and contain more calories than chicken breasts, they aren’t actually that much fattier or calorie-filled, and they are certainly still healthier for you than other meats such as beef and pork. Preparation also has a lot to do with how healthy chicken thighs are; removing the skin and bone of the thigh goes a long way in bringing down the fat content. Also, since thighs are naturally juicier and more flavorful than breasts, they are less likely to end up being dry and tasteless when cooked. With chicken breast recipes, I often find that extra fat is added while cooking in an attempt to make the breasts moister, which negates any nutritional benefit they would have had over thighs in the first place. (Check out this article, or this one, if you want to learn more about the nutrition of chicken thighs.)
Of course, there is one other significant reason I most often use chicken thighs rather than breasts – the price. Chicken thighs are often at least a couple dollars cheaper per ounce than chicken breasts, and this adds up quickly.
-

- Skin-on, bone-in chicken thighs – $1.69/lb.
-

- Boneless, skinless chicken thighs – $3.89/lb.
-

- Boneless, skinless chicken breasts – $4.59/lb.!
Skin-on, bone-in chicken thighs are the cheapest – and the best part is, the skin and bones can be easily and quickly removed at home! Why pay a couple extra dollars for something that takes you a minute or two to do yourself? Although I almost never cook with skin-on, bone-in chicken thighs because it greatly ups the fat content, I buy them that way all the time and then just remove the skin and bones myself. Let me show you how easy it is!
How to De-skin, De-bone Chicken Thighs
Start out with your chicken thighs and a pair of kitchen shears or a sharp knife. (If you don’t have a good pair of kitchen shears, I encourage you to invest in some! They make cutting meat SO much easier! However, a good, serrated knife will work as well.)

Slip your finger under the skin, and it should start to peel off immediately with no cutting necessary.

Once the skin is mostly peeled away, snip it off where it is still clinging to the chicken.

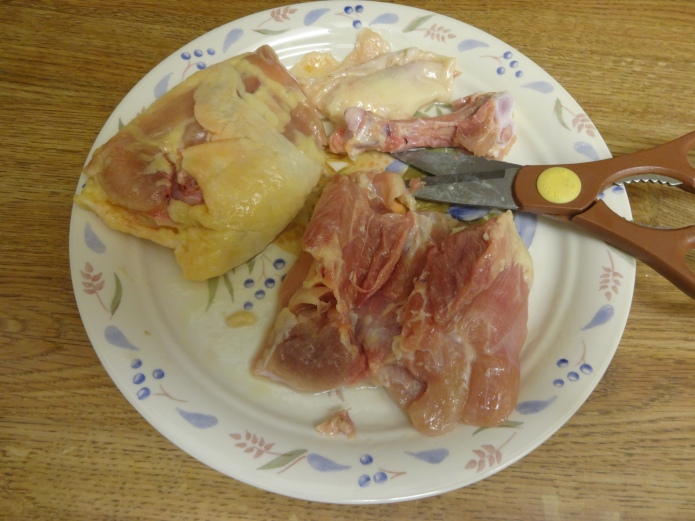
Now, on to the bone! Flip the chicken over to the side where you can tell the bone is closest to the skin, and make one long cut along the right side of the bone.

Make another long cut along the left side of the bone, leaving only the underside of the bone clinging to the chicken.

Make one more long cut along the underside of the bone, cutting it away from the thigh altogether.

Ta da! You have now de-skinned, de-boned a chicken thigh, and it is ready for you to use in a recipe! The whole process shouldn’t have taken more than a minute or two for one thigh. Repeat the process with however many chicken thighs you want to use at the time.

Although your first thought is probably to toss out the bones, don’t give into the temptation! The skin is fatty and should be discarded, but keep and freeze the bones for later use. When you get enough, you can use them to make a scrumptious homemade chicken stock or soup. I have a bag in the freezer that I add to whenever I de-bone chicken thighs, and when I have 10-12 of them it’s soup time! (Look out for my chicken bone soup recipe on the blog in the near future!)

My frozen bag of chicken thigh bones
I hope you found these instructions helpful! If you de-bone chicken thighs using this method, let me know how it worked out in the comments section!
